Many homeowners want to take proactive steps to improve their tap water quality without waiting for utility upgrades. This guide walks you through practical, evidence-informed DIY actions you can take to reduce common municipal tap water contaminants, while being clear about what you can realistically achieve on your own.
Municipal water systems meet regulatory standards, but aging infrastructure, seasonal changes, and unregulated contaminants can still affect what comes out of your faucet. Understanding your water quality report, selecting the right treatment method, and maintaining it properly are the core of effective DIY mitigation.
- Read your annual Consumer Confidence Report to know what’s in your water before buying any treatment.
- Match each contaminant of concern to a certified technology (carbon, RO, ion exchange, specialty media).
- Point-of-use systems are affordable for drinking water; whole-house systems protect plumbing but cost more.
- Install carefully, maintain on schedule, and verify performance with post-installation lab testing.
- Call a licensed plumber or water treatment specialist for lead service lines, complex installs, or persistent problems.
Start with Your Annual Water Quality Report
Every community water system must provide a Consumer Confidence Report (CCR) each year, usually by July 1[1]. You can find it on your utility’s website, request a paper copy, or search the EPA’s online database. The report lists detected contaminants, their levels, and how they compare to legal limits. Focus on any contaminant that exceeds a health-based guideline (such as EPA’s Maximum Contaminant Level Goals) or that you have a specific concern about, like lead, disinfection byproducts, or PFAS.
If your report shows no violations, that doesn’t mean your water is free of all contaminants — it means it meets current regulatory standards. Some contaminants have no enforceable limit, and others may spike between testing periods. Keep a copy of the most recent CCR and note the date; you’ll use it to decide which treatment technology targets your specific concerns.
For contaminants not listed in the CCR (such as emerging chemicals or those from your home’s plumbing), you may need independent testing. A certified laboratory can analyze a sample for a broader panel. This step is optional but recommended if you have old pipes, a private well component, or unexplained taste, odor, or color issues.
Match Contaminants to Treatment Technologies
No single filter removes everything. Activated carbon (granular or block) reduces chlorine, taste, odor, and many organic chemicals including some pesticides and disinfection byproducts. It does not reliably remove lead, arsenic, nitrate, fluoride, or most PFAS unless specifically certified for those contaminants. Look for NSF/ANSI Standard 42 (aesthetic effects) and Standard 53 (health effects) certifications on the product packaging.
Reverse osmosis (RO) systems force water through a semipermeable membrane, reducing a wide range of dissolved solids, heavy metals (including lead and arsenic), nitrate, fluoride, and many PFAS. They typically include pre- and post-carbon filters. RO wastes water (often 3-5 gallons per gallon treated) and removes beneficial minerals; some units include a remineralization stage. Certification to NSF/ANSI Standard 58 confirms performance claims.


Ion exchange softeners target hardness minerals (calcium, magnesium) and can be configured to remove certain radionuclides or nitrate. They do not remove most organic chemicals or microbial contaminants. Specialty media (such as activated alumina for fluoride or specific resins for PFAS) exist but are less common in residential units. Always verify the product’s performance data sheet for the contaminants you need to address.
Choose Between Point-of-Use and Point-of-Entry Systems
Point-of-use (POU) systems treat water at a single tap — typically the kitchen sink. Options include countertop pitchers, faucet-mounted filters, under-sink carbon blocks, and under-sink RO units. POU is cost-effective for drinking and cooking water only. Prices range from $20 for a basic pitcher to $300-$600 for a quality under-sink RO system, plus annual filter replacement costs of $50-$150.
Point-of-entry (POE) systems treat all water entering the home. Whole-house carbon tanks, sediment filters, and water softeners are common POE configurations. They protect plumbing, appliances, and shower water but are larger, more expensive ($800-$3,000+ installed), and require professional plumbing for most installations. POE does not replace the need for a POU drinking water filter if your target contaminants require RO or specialized media.
Decide based on your CCR findings, budget, and whether you want to treat only consumption water or all household water. Many homeowners start with a POU system and add POE later if needed. Renters may prefer portable countertop or faucet-mounted units that don’t modify plumbing.
Install and Maintain Your Chosen System
Follow the manufacturer’s installation instructions exactly. For under-sink POU units, you’ll need basic tools (adjustable wrench, tubing cutter, bucket) and comfort with shutting off water supply lines. RO systems require a drain saddle connection and a dedicated faucet hole in the sink or countertop. If you’re unsure about any step — especially drilling or modifying supply lines — hire a licensed plumber. Improper installation can cause leaks, bypass filtration, or damage cabinets.
Maintenance is where DIY efforts often fail. Carbon filters typically need replacement every 6-12 months; RO membranes every 2-3 years; sediment pre-filters every 6-12 months. Set calendar reminders based on the manufacturer’s schedule and your water usage. Some systems have indicator lights or flow meters; don’t ignore them. Always flush new filters per instructions before use to remove carbon fines and sanitize the system.
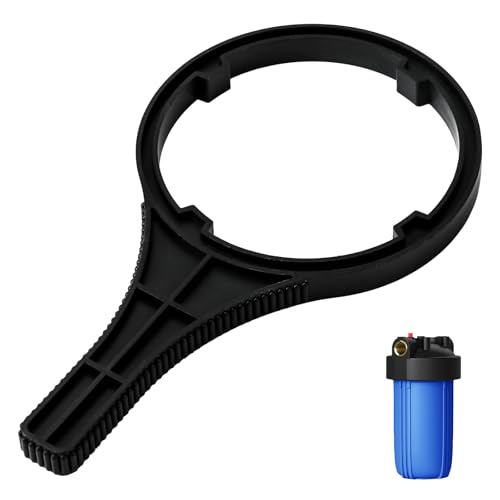
Sanitize the system annually (or after any service) using a food-grade sanitizer approved for the unit. Keep a log of filter changes, dates, and any water quality observations. If you notice reduced flow, odd taste, or leaks, troubleshoot promptly — a clogged pre-filter or failed membrane can let contaminants pass through.

Test After Installation and Set a Monitoring Schedule
After installation and initial flushing, collect a sample from the treated tap and send it to a certified lab for the contaminants you targeted. This verifies the system works as expected in your specific plumbing. Many labs offer discounted packages for common contaminant groups. Compare results to your pre-treatment baseline (if you have one) and to the product’s performance claims.
Plan to retest annually, or sooner if your CCR changes, you notice taste/odor shifts, or there’s a known event like a water main break or seasonal algae bloom. For lead, test after any plumbing work or if your home has a lead service line[3]. Keep all lab reports in a folder for trend tracking and potential resale disclosure.
If test results show the system isn’t reducing a contaminant as expected, check for bypass leaks, exhausted filters, or incorrect installation. Contact the manufacturer’s technical support with your data; reputable companies will help troubleshoot. Do not assume the system is working without verification.
Know When to Call a Professional
Certain situations exceed typical DIY scope. If your home has a lead service line, partial replacement by the utility may be required, and disturbing the line can temporarily spike lead levels[4]. A licensed plumber should evaluate and coordinate with the water utility. Complex whole-house installations (especially those requiring pipe cutting, pressure tank integration, or electrical for UV systems) should be done by a professional to meet code and avoid leaks.

Persistent contamination issues — such as recurring coliform bacteria, high arsenic, or PFAS levels above treatment capacity — may need engineered solutions like multi-stage POE systems, oxidation/filtration, or alternative water sources. A water treatment specialist (certified by WQA or similar) can design a system based on comprehensive water analysis. If you’re unsure about any step, consulting a professional is safer and often cheaper than fixing a DIY mistake.
FAQ
Can a simple pitcher filter remove lead?
Most basic pitcher filters only meet NSF/ANSI Standard 42 for taste and odor. To reduce lead, you need a filter certified to NSF/ANSI Standard 53 for lead reduction[2]. Check the product’s performance data sheet before relying on it for lead.
How often should I replace my reverse osmosis membrane?
Typically every 2-3 years, but it depends on water quality and usage. Monitor total dissolved solids (TDS) rejection with a handheld meter; if rejection drops below 90%, it’s time to replace. Always follow the manufacturer’s schedule.
Is it safe to install an under-sink filter myself?
If you’re comfortable with basic plumbing (shutting off valves, connecting compression fittings), yes. If you need to drill a countertop hole for a dedicated faucet or modify supply lines, consider a plumber to avoid leaks or damage.

Do I need to test my water after installing a filter?
Yes. The only way to confirm the system reduces your target contaminants in your specific plumbing is a certified lab test. Test after installation and at least once a year thereafter.
This guide provides general DIY information; it does not replace professional water testing, plumbing, or engineering advice. If you have a lead service line, complex contamination, or any doubt about installation or performance, consult a licensed plumber or certified water treatment specialist.
References
- CCR Information for Consumers. U.S. Environmental Protection Agency. Accessed 17 September 2026
- Consumer Tool for Identifying Point-of-Use and Pitcher Filters Certified to Reduce Lead in Drinking Water. U.S. Environmental Protection Agency. Accessed 24 August 2026
- Lead Service Lines. U.S. Environmental Protection Agency. Accessed 24 August 2026
- Basic Information about Lead in Drinking Water. U.S. Environmental Protection Agency. Accessed 24 August 2026
These statements have not been evaluated by the Food and Drug Administration. This information is not intended to diagnose, treat, cure, or prevent any disease. Content is for informational purposes only and is not medical advice; consult a qualified healthcare provider before starting any supplement. As an Amazon Associate we earn from qualifying purchases.
